
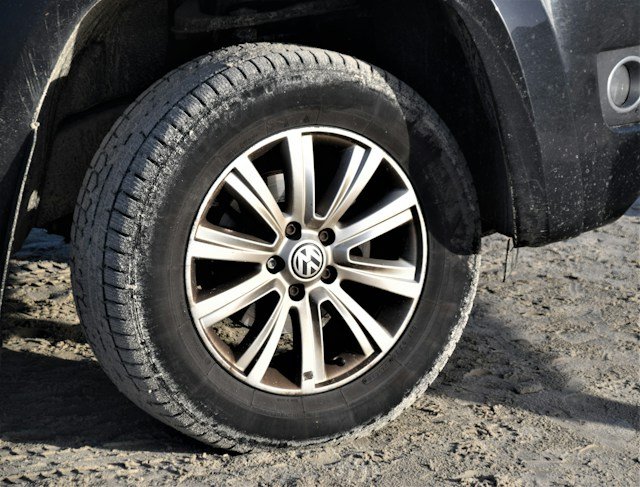
It can happen to anyone after an innocent bump with a kerb, worn-out shock absorbers or simply old material; a flat car tyre. For inexperienced drivers, or people who have never changed a car tyre before, this can be a stressful moment. Regardless of which driver type With the right preparation, knowledge, and tools, you can change your tyre quickly and safely. This guide provides a detailed step-by-step plan to make the process as easy as possible.
What you'll need to change a tyre
Before you start, there are a few items you'll need. Make sure you always have these in your car so you're well-prepared should you unexpectedly need to change a tyre.
- Spare wheel
- Creek
- Wheel brace
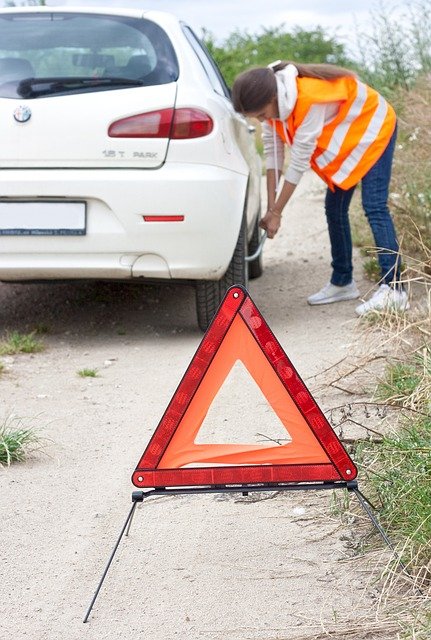
- Safety triangle
- Work gloves (optional)
- Reflective clothing (optional)
- Torch (if needed, particularly in the dark)
Step-by-step guide to changing a tyre
Step 1: Safety first
The hazard warning triangle is a red reflector that is mandatory in most countries to have in your car. Normally, the triangle is located in the well of your spare tyre on the inside of the boot lid in the luggage compartment. Place the safety triangle approximately 30 metres from your car, clearly visible and facing oncoming traffic. Ensure your car is on a safe, level surface, as far as possible from passing traffic. Then, put your car in park and activate the hazard lights. You can switch on the hazard lights by pressing the button with the red triangle in the centre of your dashboard.
Step 2: Lock the wheels
To prevent the car from rolling, place a firm object, such as a stone or a block of wood, behind the wheels that are not being changed. Ensure that the object is sturdy enough to bear the weight of the car and that it remains securely in place. Also, check that the wheels are properly chocked before you start changing the car tyres. This is extremely important for your own safety, as well as that of other road users.
Step 3: Loosen wheel nuts
Once you have completed the preparatory steps, changing the tyre begins. Use the wheel brace to loosen the wheel nuts a quarter turn anti-clockwise. Do this before jacking up the car.
Step 4: Jack the car up
Place the jack under the designated jacking point of your car. This point is usually on the underside of the car, beneath the doors. Consult the manual to find the exact location. Then, jack up the car until the flat tyre is completely off the ground.
Step 5: Wheel nuts and wheel removal
Fully remove the loose wheel nuts and place them in a safe place. Then remove the punctured wheel and place it in a safe spot so it doesn't obstruct traffic. It may happen that the wheel won't come loose. You can try this: tighten a few nuts or bolts, then loosen them one turn. Lower the jack so the car's weight rests on the wheel. Move the steering wheel back and forth a few times and/or drive forwards a short distance and then brake. Jack the car up again and check if the wheel has come loose. If this doesn't work, it is advisable to breakdown assistance to enable it.
Step 6: Fit the spare wheel
Place the spare wheel onto the hub. Ensure the wheel is fitted evenly onto the studs.
Step 7: Tighten wheel nuts
Hand-tighten the wheel nuts onto the spare wheel. Ensure the wheel is seated correctly before firmly tightening the nuts with the wheel brace.
Step 8: Lowering the car
Carefully lower the car by slowly releasing the jack. Remove the jack as soon as the car is fully on the ground.
Step 9: Check wheel nuts
After lowering the car, tighten the wheel nuts crosswise with the wheel brace to ensure the wheel is securely fastened.
Step 10: Tidy up
Put the flat tyre, jack and tools back in your car. Don't forget to pack away the warning triangle.
Back on the road
Once you have changed the tyre and tidied everything up, it's time to resume your journey. Be extra vigilant and try not to drive on the spare tyre for too long. As a precaution, it may be wise to take photos as proof for your car insurance. It is a legal requirement not to drive faster than 80 km/h on a space-saver spare tyre, which in this case is also known as a "get-you-home" or "limp-home" tyre. As the name suggests, it is advisable to drive directly home and make an appointment at a garage so that you can get back on the road quickly with a complete set of well-functioning tyres.